Sunday, November 27, 2011

Not Your Mother's Sweet Potato Pie

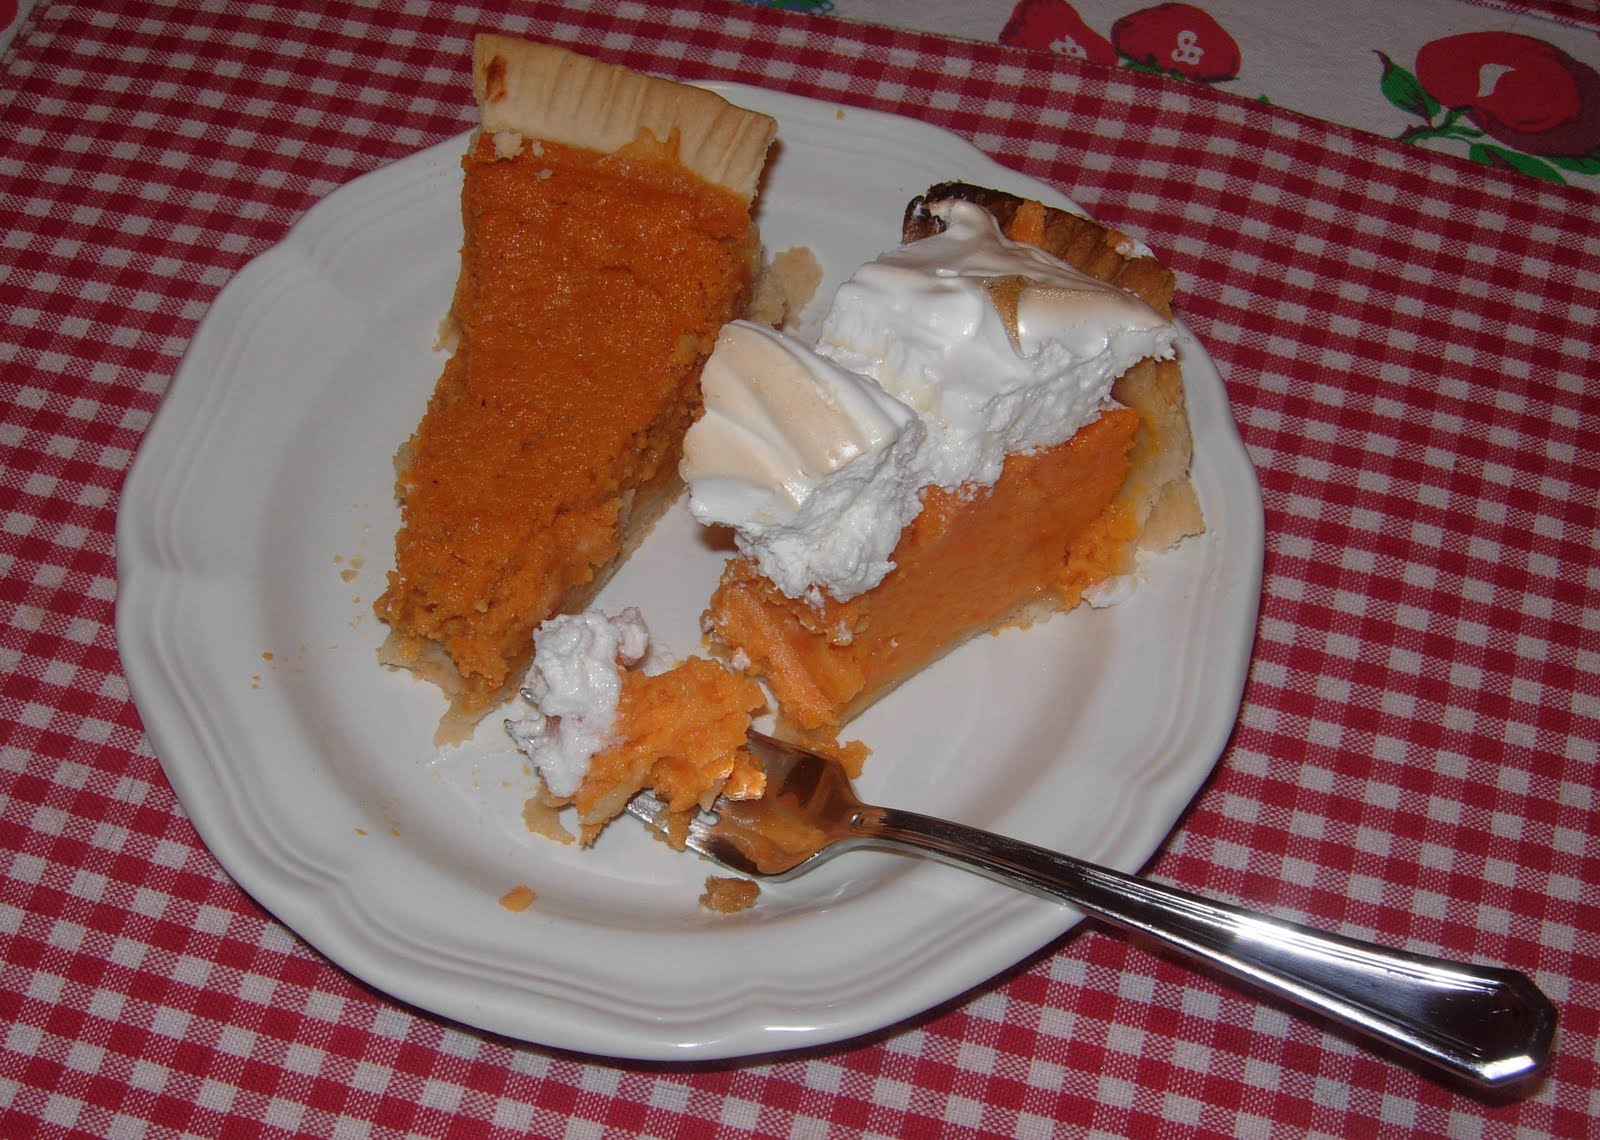
While we're still deconstructing Thanksgiving -- and mine was pretty fabulous BTW -- I should confess that the marshmallow meringue sweet potato pie that was being fast tracked to Turkey Day never made it to the head of the dessert table. At the very last minute, (and probably due to the same proclivities that kept me single for 40 years), another sweet potato dessert caught my eye and, the sweet tooth being weak, I yielded to temptation. It's what happens when I read food porn (that's any cookbook with pictures) late at night.

This recipe for Sweet Potato Tart Tatin, (that's "tart" without an "e," presumably because this dessert is as American as the sweet potato), comes from DamGoodSweet, a book of "New Orleans style desserts," by David Guas and Raquel Pelzel. Don't know them and haven't tried anything else from this cookbook but, judging by this dish, it looks promising.

If you can call a sweet potato dish sophisticated, this is it: sweet potatoes, sliced thin, layered on top of a rich French caramel, and covered with buttery puff pastry. This is sweet potatoes all grown-up and going to the prom. And the best part? I get to use one of my cast iron skillets. I always feel more authentic when I use a cast iron skillet.

A few preparation tips. Choose long, slender potatoes of relatively even width (about three medium). For slicing I prefer to use my Cuisinart equipped with the slicing disc, but a mandoline slicer would also work nicely. Unless you really want to make your own puff pastry, (get a life already), I recommend using store-bought frozen puff pastry sheets. They're quite good and nobody will know the difference unless you tell them. Finally, once removed from the heat, caramel hardens quickly. Pour fast and spread evenly. If it gets too stiff to spread, set the skillet over the burner for a few seconds to soften.

It may not be a Tart (no 'e') Tatin in the strictest sense of the word, (unless you consider the sweet potato a fruit, and who am I to judge), but it is delicious. Sweet enough, but not too sweet, (Seriously, where I come from most people would consider this a side dish.), served warm or chilled, with ice cream, whipped cream or unadorned; this is not your Mother's sweet potato pie. But it might be yours.


Sweet Potato Tart Tatin

1 sheet frozen puff pastry, thawed
3/4 cup sugar, plus 1 tablespoon for pastry
1/4 cup water
1 stick unsalted butter, cut into cubes
2 teaspoons vanilla
1/8 teaspoon salt
1 1/2 pounds sweet potatoes, peeled and sliced into 1/8-inch thick rounds
1 egg
1 tablespoon milk

Preheat oven to 375 degrees.

Roll out one sheet of defrosted puff pastry. On floured surface, roll lightly to blend in any seams. Cut out a 10-inch circle. Transfer pastry circle to a parchment lined baking sheet, prick all over with a fork and refrigerate until needed.

Stir together 3/4 cup of sugar and 1/4 cup of water in a small saucepan. Partially cover and bring to boil over medium-high heat. Cook, partially covered, 3 or 4 minutes or until syrup is clear and bubbling. Remove cover and cook until mixture is a light butterscotch color and the temperature reaches 320 degrees. Turn off the heat (the mixture will continue to cook) and measure the temperature until it reaches 350 degrees (this will only take a few minutes), whisk in the butter, a few cubes at a time, thoroughly blending after each. Stir in the vanilla and the salt. Pour quickly into a 10-inch cast iron skillet, spreading evenly across the bottom.

Layer the sliced potatoes over the caramel, starting in the center and overlapping in a spiraling outward circle as you go. Top with the puff pastry, tucking it in round the edges of the skillet.

Mix the egg and the milk together and brush over pastry. Then dust with the remaining 1 tablespoon sugar.

Bake about 40 to 45 minutes, until the edges are brown and the pastry is puffed and golden. Allow to cool for at least 15 minutes (up to an hour). Invert onto a large plate -- make sure it's larger than 10 inches in diameter as there will be some liquid on the bottom -- and serve.

I really, really love this "pie."


Saturday, November 26, 2011

The Great Sweet Potato Pie-Off

Where I grew up Thanksgiving was most certainly not synonymous with pumpkin pie. Pumpkin pie was something Yankees ate for the holiday, and if we ever saw one, (like the Thanksgiving when my best friend's mother was puttin' on the dog to impress her son's new North Carolina in-laws), it came out of a box marked Mrs. Smith's.

Come to think of it, Thanksgiving in Middle Georgia didn't mean turkey back then either -- but rather two large, fat hens perched atop a pan of soupy cornbread and biscuit dressing, and baked until the dressing was just dry but still spongy to the touch. Turkeys came later, along with instant mashed potatoes and gravy made with Campbell's Cream of Mushroom Soup, and then the whole holiday went to hell. But that's another blog entry.

This one's about the pies. On Thanksgiving we expected, we anticipated, and we ate that most plain and elegant of southern holiday desserts, sweet potato pie.

Not to be confused, as they invariably are, with yams, sweet potatoes are an indigenous American crop which, if the legends of our forefathers are to be believed, might have been served at the very first Thanksgiving celebration. They've been a staple in southern kitchens ever since. My maternal grandfather, who farmed well into his 70s, planted a big field of them every year, plowed them out of the ground with a mule, (the tractor "cut them up too bad"), and stored them in a mound of earth covered with a thick layer of pine straw, digging them out as needed all winter long.

There's a good chance you've never eaten an actual yam. Native to Africa, and somewhat similar to the sweet potato in shape and color, (though yams tend to be much larger), it's understandable, if not propitious, that the kitchen slaves conflated the two. They are, alas, not the same. I ate yams in Belize and found them dry, with a chalky texture, and bland. If you were expecting a sweet potato, you probably wouldn't like them either.

I'm ever the traditionalist when it comes to the sweet potato pie I serve at Thanksgiving, but my faith was shaken this year when I found a new recipe for a version of the dessert with a hint of citrus and a marshmallow meringue topping. As fortune would have it, we had a week-before-Thanksgiving potluck at the office, and I seized the opportunity to test them on the most discerning of audiences. (Except for Art. Every year he brings a Crockpot full of 'Lil Smokies floating in off-the-shelf barbecue sauce, and everybody loves them. I hate you, Art.)

In the interest of full disclosure, I used packaged refrigerated pie crusts for this experiment; not recommended for your best shot, but a reasonable option if you ever catch yourself making two pies from scratch on a weeknight. There are lots of good pie pastry recipes out there, including elsewhere on this blog, so I'm not going publish the pastry particulars. I do suggest, however, that you bake the pie crusts at 400 degrees for about 10 minutes and allow them to cool completely before filling, as a hedge against a soggy bottom. Also when baking the filled pies it's a good idea to cover the exposed crust with a pie shield or aluminum foil wrapped around the outer edges of the plate, to prevent over-browning.

For the traditional recipe I went with Edna Lewis' Sweet Potato Pie from her classic cookbook, "The Taste of Country Cooking." (For simple yet refined southern style food, you simply can't go wrong with Edna.) The second recipe comes hot off the pages of the 2011 issue of "Southern Living: Our Best Holiday Desserts." Each recipe makes one deep-dish 9" pie or two smaller ones.

Ladies and gentlemen, place your bets and make your pies!


Edna Lewis' Sweet Potato Pie Filling

2 cups cooked sweet potatoes, mashed and sieved
1 cup sugar
1/4 teaspoon cinnamon
1/2 teaspoon nutmeg (fresh grated if possible)
1/2 teaspoon salt
3 medium eggs, separated
2 teaspoons vanilla
2/3 cup melted butter
1 2/3 cups milk (room temperature)

Bake the potatoes until soft (microwave is fine if you're in a hurry), peel, mash and put through a potato ricer or food mill.

Combine potatoes, sugar, salt, egg yolks (slightly beaten), vanilla and melted butter. Mix thoroughly. Add milk and stir well.

With an electric hand mixer, beat the egg whites to the frothy stage. Then stir them into the potato mixture.

Pour the mixture into the pastry lined pie plates and bake at 350 degrees for 40 to 45 minutes.

Allow to cool completely. Serve plain or with whipped cream or creme freshe.


Sweet Potato Pie with Marshmallow Meringue

1/4 cup melted butter
1 cup sugar
1/4 teaspoon salt
3 eggs
3 cups cooked, mashed and sieved sweet potatoes
1 cup half-and-half
1 tablespoon lemon zest
3 tablespoons fresh lemon juice
1/4 teaspoon nutmeg (fresh grated if possible)

Bake the potatoes until soft (microwave is fine if you're in a hurry), peel, mash and put through a potato ricer or food mill.

Stir together melted butter, sugar, salt and eggs. Beat until well blended. Add sweet potatoes and remaining ingredients. Stir until thoroughly mixed.

Pour mixture into pie crust. Bake at 350 degrees for 50 to 55 minutes or until a knife inserted in the center comes out clean. Cool on a rack for at least one hour, (even better, let it cool overnight), before topping with Marshmallow Meringue.

Marshmallow Meringue

3 egg whites
1/2 teaspoon vanilla
1/8 teaspoon salt
1/4 cup sugar
1 (7 oz.) jar marshmallow creme

Preheat oven to 400 degrees.

With an electric mixer, beat egg whites with vanilla and salt until foamy. Gradually add sugar, a bit at a time, and beat until peak form.

Beat marshmallow creme into egg white mixture 1/4 jar at a time. Beat until smooth (about 1 minute) and spread on top of cooked pie.

Bake at 400 degrees for 6 to 7 minutes or until meringue is lightly browned.

AND THE WINNER IS?!


To my surprise, and somewhat to my chagrin, the meringue topped pie was the hands down favorite. Ultimately I had to admit that I liked it best too.

That's not to say that the classic sweet potato pie wasn't good. It was very good, but with a softer, more custard-like texture than the denser and creamer, (great mouth feel!), meringue topped version. I also liked the brightness the lemon added to the flavor of the pie; and the marshmallow meringue topping, well, who could find fault with that?

Tuesday, July 5, 2011

Paella, Please

I don't have any interesting family tales to tell about paella. In fact, I'd never even heard of paella, much less tasted it, until I was well an adult, and then it was an occasional indulgence and certainly not anything I would ever think about cooking myself. Then one day I was looking for a dish to serve with Sangria and, as luck would have it, the Sur La Table across the street was offering a paella class. I took it. Paella took me.

It would be impossible to love New Orleans food and not notice the dish's similarity to Jambalaya, which undoubtedly has its' roots in the Spanish Paella, introduced into the region when Spain held possession of Louisiana for four decades in late Eighteenth century. So, it would be safe to say if you like one, you'll like the other. As for me, it may be sacrilege to say, but I actually prefer the more subtle flavors of paella.

The key to making this paella is good quality short grain rice, Bomba rice, which you can usually find in most large supermarkets, or, that failing, order on-line. Choose your sausage, spicy or mild, depending on how piquant you like it, (in an homage to jambalaya, I use Andouille), and, yes, you will need a paella pan. There are many to choose from with price ranges from $19.99 all they way up to $250.00. If, like me, you just want to date paella before you marry it, I suggest a mid-range steel vessel. Expect to pay about $40, (do not, I repeat, do not go non-stick). Then, if you decide to commit, invest in one of those All-Clad big boys. (I'm saving up.)

It's a meal for a crowd in a pan. Just add a salad, maybe some good French bread, and, of course, Sangria. Oh, paella, where have you been all my life?!

MIXED PAELLA
(serves 6)

1/2 teaspoon saffron threads
2 tablespoons hot water
1 3/4 cups Bomba rice
6 tablespoons olive oil, divided
6 chicken thighs, skin-on
1/2 lb. spicy sausage (Andouille) sliced 1/4" thick
2 medium onions, chopped
4 large garlic cloves, pressed or crushed
1 teaspoon Spanish smoked paprika (hot or mild to taste)
8 ounces green beans, broken into 1" pieces
5 cups low-sodium chicken broth
1 lb. medium raw shrimp, shelled & deveined
1 lb. mussels (unopened & well scrubbed)
2 red bell peppers, roasted, peeled, seeded and sliced
Salt & black pepper to taste
1/4 cup fresh parsley, chopped fine

First thing I do is roast the peppers, usually earlier in the day. I half them and seed them, then put them under the boiler, skin side up on a lined cookie sheet, until the skins blister and brown. Pop them in a brown paper bag to cool, then peel and slice into strips.

Place saffron threads into a small bowl with the 2 tablespoons hot water and let soak. Meanwhile place rice in a strainer and rinse under cold water until the water runs clear to remove some of the starch. Set aside.

Put green beans in a small bowl with about a teaspoon of water and cook in the microwave for about 2 minutes, until just crisp tender. Set aside.

Preheat oven to 400 degrees.

Heat 3 tablespoons of olive oil in a 14" paella pan or over proof skillet. Add chicken thighs and cook, turning frequently, until the skin is golden and crisp (about 8 minutes). Transfer to a plate. Add sliced sausage to the pan and cook a few minutes until beginning to crisp. Remove from pan to plate or bowl. Add shrimp to pan and stir until just pink (about 1 to 2 minutes). Remove shrimp to plate or bowl.

Add remaining 3 tablespoons of olive oil to pan. When hot, add chopped onion, garlic and paprika and cook until the onions are soft, but not brown. Add the rinsed rice and stir until the rice becomes translucent. Stir sausage slices, green beans and any accumulated juices into the rice. Stir in the chicken stock, saffron and soaking water.

Season to taste with salt and pepper. Arrange chicken thighs on top of paella and bring to a boil. Reduce heat to low and let simmer, uncovered and without stirring, for 15 minutes, or until the rice is tender and almost all of the liquid has been absorbed.

Carefully stir in the reserved shrimp. Arrange the bell pepper slices on top and tuck the mussels, seam side up, into the paella. Put the pan into the preheated oven and cook for an additional 5 minutes, until the mussels have opened and the shrimp are cook. Sprinkle with the parsley and serve immediately.

NOTE: If after the initial 15 minutes of simmering there is still a lot of liquid in the paella, place the pan in the oven and bake for about 10 minutes before adding the peppers, shrimp and mussels. Alternately, for ease of preparation, the paella can be baked in the 400 degree oven instead of simmered on top of the stove. However, this method won't yield up the 'crunchy rice' bottom so prized by paella aficionados.


Sunday, July 3, 2011

Tastes Like Summer

A hot summer day, there's barbecue on the grill, and a tub of cool ones chilling on the porch. What's a non-beer drinker like me to do? Why make Sangria, of course.

This nectar of the Gods is easy to prepare, pretty to look at, and surprisingly potent, depending on what you put in it. For the wine, I usually choose an inexpensive Spanish Tempranillo or Rioja, (This is not the time to use your premium reds. I try to keep it in the under $10 per bottle range.), but any dry red wine will do, even if it doesn't say, "Ole." Don't skimp on the spirits though. Nothing ruins a good Sangria like cheap vodka or an off-brand orange liquor.

It's a party in a pitcher. Even the beer drinkers will beg for a glass, and when it's all gone, you can fight over the wine soaked peach slices at the bottom; a treat not to be missed and well worth a broken fingernail or two.

Be warned. This is a kick-ass Sangria, but it drinks like fruit punch. So pace yourself. For less of a punch (pun intended) you can leave out the vodka. But what would be the fun in that?

Summer Sangria
(makes 8 to 10 glasses)

2 bottles Tempranillo, Rioja or other dry red wine
2/3 cup lemon flavored vodka (Absolut Citron rocks)
2/3 cup brandy
2/3 cup Cointreau
2 cups fresh orange juice
Juice of 1 lemon
Juice of 1 lime
3/4 cup sugar
1 whole orange, sliced
1 whole lemon, sliced
1 whole lime, sliced
1 ripe peach, sliced

In a large pitcher combine wine, liquors and fruit juices. Add sugar, stirring until completely dissolved. Slice whole fruit and add to pitcher. Cover and let the Sangria sit in refrigerator at least 6 hours, preferably overnight, before serving. Serve over ice with a slice of orange or lime. Tastes like summer.

Sunday, May 22, 2011

Ice Cream for the 4th


A couple of months ago, on the occasion of my birthday, a well-meaning friend gifted me with a spiffy Cuisinart ice cream maker. A devilish red plastic contraption, built for temptation and suitable for display, and not much else, I concluded, since I am perpetually dieting and currently on the upside of that extra five pounds. I put the demon machine out of sight and out of mind, on a shelf in the junk closet of my life, with the thought that I'd maybe use it 'someday.'

Now that the 4th of July is almost upon us, I've decided to call it 'someday' and pig out. When I was growing up a family get together on the 4th meant homemade ice cream, usually fresh peach right-from-the-tree, hand cranked with ice and rock salt in my grandfather's old wooden ice cream maker. The grownups would take turns cranking, and us younguns' would take turns tasting, to make sure it was firm enough to eat. When it was done, we'd devour huge bowls of it, with tablespoons, until, inevitably, somebody got sick from all the rich food they'd consumed during the day and threw up. I remember one year my cousin T-Boy Fordham, who was home from reform school for the holiday, projectile vomited all over the picnic table and a big chunk of regurgitated peach smacked me in the eye. (I can't recall if that was before or after he'd stolen the spare tires off everybody's pickups. Or that might've been at Christmas. No matter.)

So maybe not peach then, but what? I finally settled on Blackberry and Buttermilk Sherbet (from the latest edition of 'Taste of The South' magazine), because blackberries were on sale at the Farmer's Market for $1.00 a half-pint, and French Vanilla, (from 'Ben & Jerry's Homemade Ice Cream & Dessert Book'), just because I like it. Turns out to have been a serendipitious flavor
combination; one rich and smooth, the other fruity and tart. Perfect.

Blackberry and Buttermilk Sherbet
(makes 1 quart)

4 cups fresh blackberries, plus extra for garnish
2 cups sugar
2 cups buttermilk

Smash the 4 cups of blackberries with your favorite mashing tool (I use an immersion blender ) -- or toss them into the blender or food processor -- until completely pureed. Force blackberry puree through a coarse strainer to remove most of the seeds.

Stir in sugar. Add buttermilk and blend thoroughly (I give it a whirl or two with the immersion blender). Cover and refrigerate at least 4 hours, or until mixture is very cold. (If you're in a hurry -- stick it in the freezer for a half hour.)

Transfer the mixture to an ice cream maker and freeze following the manufacturer's instructions.

The sherbet will be soft, almost like a thick milk shake. To freeze hard enough to scoop, transfer to an airtight plastic container, press plastic wrap directly onto the surface, and freeze until firm. (About 4 hours)


Ben & Jerry's French Vanilla Ice Cream
(makes 1 quart)

2 large eggs
3/4 cup sugar
2 cups heavy whipping cream
1 cup whole milk
2 teaspoons vanilla extract

Whisk the eggs in a mixing bowl until light and fluffy. Whisk in the sugar until well blended. Pour in the cream, milk and vanilla and whisk to blend.

Transfer the mixture to an ice cream maker and freeze following the manufacturer's instructions.

Mixture will be very soft. Transfer to a quart container and freeze until hard enough to scoop.

I like to serve a few scoops of each in a fancy ice cream goblet, garnished with a few blackberries, maybe a couple of crisp lemon cookies on the side. Seriously delicious.

Thursday, March 17, 2011

We're All Irish on St. Patrick's Day

I was born and raised in Dublin, Georgia, have red hair, fair skin and freckles, and, when visiting Ireland, have more than once been mistaken for a local and asked directions. On the other hand I'd take a nice plate of Italian Gnocchi bathed in basil pesto, or even a slice of plain cheese pizza out of a box, over the traditional Irish meals of corned beef and cabbage, or, God forbid, Irish Stew; and both green beer and Guinness leave me longing for a crisp glass of French Pouilly-Fuissé. And don't even get me started about leprechauns. That be some seriously bad juju there.

So am I Irish? Maybe, maybe not, or, as my fondness for these Guinness Stout cupcakes might suggest, maybe just a little. In any case, as the saying goes, we're all Irish on St. Patrick's Day, even if it is just an excuse to wear green (a particularly flattering color in my case), and get sloppy drunk on stuff that you wouldn't touch any other day of the year. (If it's Irish and alcoholic, make mine Baileys. Always.) Certainly it was a good enough excuse to make these amazing gingerbread goodies for the first time. They're so good you won't need an excuse to make them again. Trust.

Guinness Gingerbread Cupcakes with Lime Frosting
(Makes 12)
1/2 cup Guinness Stout (or other stout beer)
1/2 cup molasses
1/2 cup vegetable oil
1/4 teaspoon baking soda
3/4 cup brown sugar, packed
1 1/3 cups all-purpose flour
1 1/4 teaspoon baking powder
2 teaspoons ground ginger
1 teaspoon ground cinnamon
1/4 teaspoon ground cloves
1/2 teaspoon salt
2 large eggs, room temperature
1/2 cup finely minced candied or crystallized ginger

Lime Frosting

4 tablespoons (1/2 stick) unsalted butter, room temperature
1 1/2 cups confectioners' sugar, sifted
1 1/2 tablespoons lime juice (fresh or bottled) - or to taste
1 to 2 tablespoons milk (optional, if needed to thin)
A few drops of green food coloring (optional)

Preheat the oven to 350 degrees. Place cupcake liners in a standard 12-cup muffin pan.

In a large saucepan (4 or 5 quarts) bring the stout, molasses and vegetable oil to a boil. Remove from heat and whisk in the baking soda. (The mixture will foam up, then settle down.) Stir in the brown sugar and let cool until just warm.

Sift together flour, baking powder, ground ginger, cinnamon, cloves and salt.

Whisk eggs into the cooled stout mixture, one at a time. Then stir in the flour mixture until just mixed. Add the candied ginger. (Note: Batter will be thin and lumpy.)

Divide batter among the cupcake liners and bake 20 to 25 minutes until set in center. Cool before frosting.

In a stand mixer (with paddle attachment if you have it) beat the butter until smooth. Add half the confectioner's sugar and blend on low speed. Add lime juice, mix in, and then add the rest of the sugar, mixing on low speed until frosting is smooth and fluffy. Taste for seasoning. Add more lime juice if you want a stronger flavor. If mixture is too thick, add a tablespoon or two of milk until you get the consistency you want. At the end, add drops of green food coloring until desired color is achieved.

Frost cupcakes. Eat. Erin go Bragh.

Note: You can very easily make 24 cupcakes by doubling all ingredient quantities except the candied ginger, which I increase to 2/3 cup.

Monday, February 14, 2011

Valentine Cookies for Adults

I just whipped up a batch of these yummy treats for Valentine's Day. I call them Valentine cookies for adults. And no, it's not what you think! (Although you could make them 'that' way.) The "adult" in these cookies comes from a generous infusion of freshly ground coffee beans, and, yes, I would recommend that you hide them from the kiddies unless you want a bunch of caffeinated rug rats running about ruining your romantic celebration.

This recipe comes from Fine Cooking, and they are all that. (Seriously, how can you miss with a combination of chocolate and coffee.) The original recipe called for espresso beans, but when I discovered I was out, I substituted dark roast Guatemalan coffee beans from Starbucks and they turned out great -- sweet, rich and sophisticated, just the way I like all my Valentines!


Chocolate-Dipped Mocha Shortbread Cookies
(Makes about 4 dozen, depending on size)

1 cup (2 sticks) cold unsalted butter, cut into cubes
1/2 cup sugar
1/2 teaspoon salt
2 1/4 cups all-purpose flour
2 tablespoons finely ground dark roast or espresso coffee beans
9 ounces semisweet chocolate, chopped
1 tablespoon vegetable shortening

Line two baking sheets with parchment. Combine butter, sugar and salt in stand mixer bowl. Using paddle attachment, mix on low speed until the butter and sugar are just combined. Mix ground coffee into flour and add to sugar mixture in batches, mixing on low speed until the dough has pulled together.

On a lightly floured surface, roll the dough to about 1/4 inch thick. Cut with heart-shaped cookie cutter (or another shape fitting the occasion or your mood -- the possibilities are endless) and place on lined cookie sheets. Press scraps together, roll and cut until all the dough is used up. Refrigerate cookies on sheets about 20 minutes.

Position over racks in the upper and lower thirds of oven and preheat to 300 degrees. Bake about 30 minutes, until pale golden brown. After 15 minutes swap the position of the baking sheets and rotate 180 degrees. Cool on wire racks.

Put chocolate and shortening in the top of a double boiler over simmering water. Melt chocolate, stirring, until smooth and warm. (Do not overheat or boil!) Dip half of each cookie into the chocolate. Set back on parchment lined cookie sheets and let chocolate set up at room temperature, about two hours.

They'll thank you really care!

Friday, February 4, 2011

Cornbread For Dessert


If you like cornbread as much as I do, the idea of having it for dessert won't strike you as odd. And, quite frankly I've tasted some Yankee cornbread that was sweeter than this cake. (No offense, mind you. The moment I tasted cornbread sweetened with sugar I knew it was a match made in heaven. And, no, 'real' southerners don't put sugar in their cornbread.)

This Chardonnay and Cornmeal cake is another recipe from my Forks & Corks class at the John C. Campbell Folk School, (Thanks, Martha Vining!), and it came out just as well in my own kitchen when I tried it at home. It's a light (well, as light as anything with butter, eggs and sugar can be), quick, easy, and unexpected finish to a meal. Think of it as a cross between cornbread and pound cake, exhibiting the best characteristics of each. Your guests may be skeptical at first, (I was.), but then they'll ask for a second piece. Almost guaranteed.


Chardonnay and Cornmeal Cake

1 1/2 cups all-purpose flour
1 tablespoon baking powder
1/2 teaspoon salt
2/3 cup yellow cornmeal
2/3 cup slivered almonds
1/2 cup (1 stick) butter, diced
1 cup sugar
2 eggs
1 cup Chardonnay

Preheat oven to 350 degrees. Spray 9-inch cake pan with baking spray and line with parchment or waxed paper.

Sift together flour, baking powder and salt into the bowl of your food processor. Add cornmeal, slivered almonds, butter and sugar. Pulse until mixture forms crumbs that clump together. Add eggs and wine and pulse until just smooth. Pour batter into prepared pan and bake 45 to 55 minutes, or until the cake starts to shrink from the sides of the pan. Cool on rack about 10 minutes before removing from pan.

Delicious plain, or serve with Creme Fraiche, whipped cream, or topped with your favorite homemade fruit preserves or jam. Better yet, if you have some of that homemade lemon curd left over, it totally rocks it!

Saturday, January 29, 2011

When Life Gives Me Lemons, I Make Curd

My love affair with lemons began the day my then husband-to-be and I moved into our first apartment together, the first floor of a big, rambling duplex on 6th Street in Los Angeles, with a prolific, full-grown Meyer Lemon tree in the backyard. Our landlady, who lived upstairs, didn't care for the fruits and was content to allow them to mold and rot on the ground. I, on the other hand, had always wanted a lemon tree, if for no reason other than they were quintessentially California, and having one somehow made me feel grounded in my adopted state.

I quickly set about to rescue and use every single one of the baseball sized fruits and discovered, just as quickly, how few lemons it actually takes to make lemon anything (other than, say, lemonade). So I made lemon pies, lemon cakes, lemon cookies, lemon bread and, of course, lemon curd, and still had enough lemons left to fill up my freezer with gallon baggies of lemon juice frozen into cubes. (A trick I recommend highly whenever one has a surfeit of lemons -- fresh lemonade all year long, and what could be better than that?)

Needless to say, along the way I became addicted to lemons. Then, just when I was beginning to take them for granted, we moved away and left the amazing lemon tree behind. Ever since I've tried in vain to grow my own. My current crop of four puny semi-dwarf Meyer Lemon trees struggle along and this year threaten to bear a grand total of seven fruits. (A full seven more than they produced last season.) Fortunately I have friends who have better luck growing lemons than I do, and are happy to share their bounty. So perhaps I should say, when friends give me lemons, I make curd.

Use Meyer Lemons if you can find them. (A Chinese lemon thought to be a hybrid of a lemon and an orange or mandarin, Meyer Lemons have a thin rind and are less acidic and slightly sweeter than regular lemons.) If not, any lemons will do. This lemon curd is extremely rich and exceptionally good with biscuits, croissants, scones (my favorite serving suggestion), or even served over vanilla ice cream, and it's a great filling for pies and tarts as well. Seriously, I think it's why God created lemons.


Meyer Lemon Curd
(Makes 4 cups or half-pint jars)

2 1/4 cups sugar
1/2 cup grated lemon zest (about 3 lemons)
1 cup freshly squeezed lemon juice (about 3 lemons)
3/4 cup unsalted butter, cut into cubes (1 1/2 stick)
7 egg yolks
4 whole eggs

Heat water in the bottom pan of a double boiler to a gentle boil.

While it heats, whisk the egg yolks and whole eggs together in the top of the double boiler. Whisk in the sugar and lemon zest. Blend until smooth and add lemon juice and butter cubes.

Place the top of the double boiler over the gently boiling water in the bottom pan and cook, stirring gently, until the mixture reaches 170 degrees on a food thermometer.

Remove boiler from heat. Continue to stir until curd thickens, about 5 minutes. Strain through a mesh strainer. Discard collected zest.

Curd will keep, covered, in the refrigerator for about a week.

If you want to can the curd, pour it into sterilized half-pint jars, and process in boiling water for 10 to 15 minutes. Makes 4 half-pints. (Note: Sources vary as to the shelf life of canned curd from three or four months to up to a year. In our house it never lasts that long anyway, but you takes your chances.)

Because its' the perfect complement to scones, I've included a simple scone recipe, so easy you can whip up a batch in a few minutes and well worth it as a special treat for breakfast or, dare I suggest, afternoon tea. (A great excuse for a party!)

Simple Raisin Scones
(Makes 8 scones)

2 cups all-purpose flour
1/3 cup, plus 1 tablespoon, sugar
1 teaspoon baking powder
1/4 teaspoon baking soda
1/2 teaspoon salt
8 tablespoons unsalted butter, frozen (1 stick)
1/2 cup raisins (dried currants, cranberries work too)
1/2 cup sour cream
1 egg

Preheat oven to 400 degees

Mix flour, 1/3 cup sugar, baking powder, baking soda and salt in a medium sized bowl. Grate butter into the flour mixture and use your fingers to work the butter into the mixture. Stir in the raisins.

In a separate bowl whisk sour cream with the egg until smooth.

Using a fork, stir sour cream mixture into four mixture. Using your hands. press the dough against the bowl until it forms a ball. (The dough may be sticky, but as you press it will come together.)

Place dough on a lightly floured surface and pat into a 7-to-8-inch circle. Sprinkle with remaining 1 tablespoon sugar. Using a sharp knife, cut into 8 triangles.

Place triangles on a cookie sheet lined with parchment paper. Bake about 15 minutes, until golden.

Serve with lemon curd and fresh strawberries! Enjoy!