Monday, December 21, 2009

Red Velvet Christmas Cake

If you're looking for a showstopper dessert for Christmas that tastes as good as it looks, have I got a cake for you! Seriously, nothing says "Christmas" like a red velvet cake, baked in square pans and decorated to look like the most delectable gift package ever to grace the holiday dessert table.

There must be hundreds of variations on red velvet cake, a different recipe in every southern cookbook, but I've never found one that could beat Miss Vickie's. Miss Vickie is a friend from Gordon, GA, and those ladies know when it comes to red velvet cake. Her recipe is so quick and easy -- dump all the ingredients in one bowl and mix it up -- that you won't mind the extra time it takes to decorate and, if you're the lazy type, (or it isn't Christmas), it makes a fine presentation just cooked in round pans and covered with the cream cheese butter cream frosting.

As a bonus, it's also the best tasting red velvet cake around, moist, flaky, melt-in-your-mouth yummy.

Merry Christmas, ya'll!

MISS VICKIE'S RED VELVET CAKE

2 1/2 cups cups cake flour
1 1/2 cups sugar
1 1/2 cups vegetable oil
1 cup buttermilk
2 eggs
1 teaspoon vanilla
1 teaspoon cocoa
1 teaspoon baking soda
1 teaspoon salt
1 teaspoon cider vinegar
1 1-ounce bottle red food coloring

Preheat over to 350 degrees. Mix all ingredient in a large bowl. Pour into four prepared, (I use Baker's Secret), 8-inch square (or round) cake pans and bake at 350 degrees for 25 minutes. Cool in pans for 15 minutes then on cake racks until completely cool.

Frosting
(You'll need two batches for the "present" cake)

6 cups powdered confectioner's sugar
1 8-ounce package cream cheese, room temperature
1/2 cup (1 stick) unsalted butter
1 teaspoon vanilla
1 cup chopped pecans

Spread frosting with chopped pecans between layers of cake.

Make a second batch of the frosting, omitting the chopped nuts, to ice top and sides.

Make "ribbon" from foot-long fruit roll-ups, slightly moistened and coated with sparkling sugar. Unroll roll-up, leaving the paper backing on. Lightly spray with water and sprinkle with sugar. Let sit for a few minutes until sugar sets. Peel off backing, lay long strips across cake and fashion bow from shorter pieces folded over and pressed into icing on top of cake.

If you want to put gingerbread men on the side, purchased ones will do nicely. However, if you'd like to make your own, see my Gitmo Gingerbread Men recipe, previously posted, and maybe make them without the amputations, just this once.

Prepare for ohhhs and ahhhs (never fails), and make sure you ask somebody else to cut the cake. you won't be able to bear doing it yourself!

Friday, December 18, 2009

Gitmo Gingerbread Men

I was never much on gingerbread cookies, certainly not gingerbread men, (or women either, for that matter), but that all changed a couple of years ago when these nifty little gingerbread people cutters with missing limbs turned me into a gingerbread cookie aficionado. A momentary craze, and having been featured in Bon Appetit no less, the little suckers proved almost impossible to find, but a dogged search turned them up on ebay at six times the price. They have, however, over the years, proven simply priceless.

With gingerbread men that look like these, who really cares what they taste like? Well, since I do, I've found a wonderful, crisp, not-too-sweet, but just right, gingerbread cookie recipe to complement them. They're easy to make, keep for weeks in an air-tight tin, and make perfect "a little something to let you know we're thinking of you" presents for the terrorist or political prisoner on your holiday gift list.

These cookies have been tortured, bitten, mauled and mutilated. I call them my Gitmo Gingerbread Men. You can call them anything you like. In fact, you could even make them with ordinary gingerbread men cookie cutters, but what's the fun in that?


Enjoy!

CRISP GINGERBREAD COOKIES

3 cups unbleached all-purpose flour
3/4 cup packed dark brown sugar
1 tablespoon ground cinnamon
1 tablespoon ground ginger
1/2 teaspoon ground cloves
1/2 teaspoon salt
3/4 teaspoon baking soda
12 tablespoons unsalted butter (1 1/2 sticks), softened
3/4 cup unsulphured molasses
2 tablespoons milk

In food processor fitted with steel blade, process flour, sugar, ciinnamon, ginger, cloves, salt and baking soda until combined.

Cut butter into small pieces and scatter over flour mixture. Process until mixture resembles the texture of meal.

With processor running, gradually add molasses and milk. Process until dough is evenly moistened and forms soft lump. (Note, you may need to "pulse" and scrape down the bowl a couple of times as this mixture is thick and doughy.)

Scrape dough onto work surface, divide into quarters. Roll each quarter between two sheets of parchment paper until about 1/8 inch thick. Leaving dough sandwiched between parchment, stack on cookie and place in freezer. Freeze until firm, about 15 to 20 minutes.

Heat oven to 325 degrees. Line cookie sheets with parchment.

Remove dough from freezer. Peel off parchment. Cut into gingerbread men or desired shapes with cookie cutters. Place on cookie sheets and bake 15 to 20 minutes, rotating cookie sheets halfway through baking.

Cook to room temperature. Decorate if desired.

Gather scarps. Repeat rolling, freezing, cutting and baking until all dough is used.

Makes a whole bunch of cookies which, if sealed in a air-tight container, will remain crisp and good for several weeks, in the unlikely event that they last that long.

Sunday, December 13, 2009

The Very Best Turkey Chili

There's nothing better on a cold, rainy day than a nice hot bowl of chili. Unfortunately (or not) we have few such days in Los Angeles, and whenever we do, like this past week, I rush to the kitchen to whip up a batch before the weather changes.

I'm partial to turkey chili. It's supposed to be ever-so-slightly better for you, having considerably less fat than beef. However, let's face it, it can also be considerably bland, and just adding a spoonful of extra chili powder isn't going to fix it.

With this recipe I discovered the formula for a thoroughly satisfying turkey chili with big chili flavor and the richness of beef chili without the fat. The secret ingredient? Chocolate. Surprised? I was too, but just a touch of chocolate seems to give the turkey chili a bit of the body it is often missing, without altering the flavor. Makes sense if you think about it, sort of like the Mexican mole sauces which contain a bit of cocoa.

So, here it is, a recipe for really good turkey chili. I'm hoping for at least one more rainstorm before the New Year so I can make it again before the Christmas eating orgy begins.

THE BEST TURKEY CHILI

Olive oil spray
1 tablespoon olive oil
1 large onion, chopped
2 medium red bell peppers, chopped
6 garlic cloves, chopped
2 1/2 pounds lean ground turkey
3 1/2 tablespoons chili powder
1 1/2 teaspoons ground cumin
1 1/2 teaspoons dried oregano
3 tablespoons tomato paste
2 15-ounce cans red kidney beans, drained (3 cans if you like lots of beans)
1 28-ounce can diced tomatoes in juice
4 1/2 cups canned low-sodium chicken broth
1 1/2 ounces (1 1/2 squares) semi-sweet chocolate, chopped
Shredded cheddar cheese and/or sour cream - Optional

Spray bottom of a large heavy pot or dutch oveen with nonstick spray. Add olive oil and heat.

Add onion, bell peppers and garlic and saute over medium high heat until vegetables are soft, about 8 minutes.

Add turkey and saute until no longer pink, breaking up large pieces with spatula or fork.

Mix in chili powder, cumin, oregano and tomato paste and stir together, about 1 minute.

Add beans, tomatoes with juices, chicken broth and chopped chocolate. Bring to boil. Reduce heat and simmer uncovered until chili thickens, about 1 hour, stirring occasionally.

Season with salt and pepper to taste. Serve with shredded sharp cheddar cheese and/or sour cream for toppings. Add a salad and cornbread and it's a meal.

Tuesday, December 8, 2009

A Doberge By Any Other Name

Some call it a cake, some call it a torte. I call it the best chocolate dessert ever, hands down.

I first heard of Doberge cake when my husband mentioned it was the kind of cake he always had for his birthdays, growing up in New Orleans, and, hint, hint, would like to have again. "It's a chocolate cake, lots of layers, I don't know where they got it." Big help.

I floundered around a few years, trying to find an approximation in Los Angeles before the internet bailed me out yet again and a search turned up Gambino's Bakery in Metairie, the very same neighborhood where Tommy was born and raised. I ordered one -- $70.00, delivered overnight by FedEx, worth twice as much as it turned out -- and it became a tradition. And while its' dark, moist, fudgey chocolate goodness seemed unlikely to be improved upon, I never-the-less harbored ambitions of one day doing it myself.

I practiced throughout this past year on a couple of "amateur" Doberge cakes, four layer chocolate concoctions that were worth it alone just for the silky pudding between the layers. They were satisfying, but the real deal remained elusive.

That would be Beulah Ledner's original Doberge cake; eight thin layers of creamy white cake, stacked with rich chocolate ganauche pudding in between, and covered in not one, but two unbelievably rich chocolate frostings -- eight cups of sugar, eight eggs, nearly a pound of butter. Oh the glory of it all.

Mrs. Ledner opened a bakery in New Orleans in the 30's and adapted the recipe from the famous Dobos Torte, created by Austrian confectioner Jozsel Dobos way back when. Wanting to give it a bit of Creole panache, she named her creation "Doberge" cake, and sold it under her own banner until 1946 when Gambino's bought the name, recipe and retail shop from the family. The recipe was published in the long out of print cookbook, "Let's Bake With Beulah Ledner" by Maxine Wolchansky, Beulah's daughter. Search as I might (and I am VERY resourseful), I haven't been able to locate a copy, (Big door prize to anybody who finds it for me!), but fortunately I did find the recipe on the internet.

This year, the husband got his homemade Doberge cake! Yes it cost me an entire day in the kitchen. Yes, it has something like 1700 calories per slice. Yes, it was absolutely worth it.


DOBERGE CAKE

1 1/2 sticks unsalted butter
2 cups sugar
1/4 teaspoon salt
4 eggs, separated
1 cup milk
3 teaspoons baking powder
3 1/2 cups cake flour, sifted
1 teaspoon vanilla
Scant teaspoon lemon juice

Preheat oven to 375 degrees. Prepare 9-inch cake pans with baking spray. Since this is an 8 layer cake, and few of us have 8 cake pans, and even fewer an oven that will hold them all at once, I use 4 cake pans and bake 4 layers at a time.

Cream butter, sugar and salt in bowl of electric mixer until smooth. Add egg yolks and blend until smooth. Add sifted dry ingredients alternately with milk. Beat until blended. Add vanilla and lemon juice.

Beat egg whites with hand mixer until they hold a stiff peak. Gently fold beaten whites into batter.

Measure 3/4 cup batter into each pan and spread evenly over the bottom. (It will be very thin.) Bake for 12 to 15 minutes. Repeat baking process until batter is completely used.

Cool completely. Stack layers with CHOCOLATE CUSTARD FILLING. Spread CHOCOLATE BUTTER CREAM FROSTING over top and sides. Chill for several hours until firm.

Frost chilled cake with ALWAYS DELICIOUS CHOCOLATE ICING.


CHOCOLATE CUSTARD FILLING

2 cups sugar
1/2 teaspoon salt
4 tablespoons flour
4 tablespoons cornstarch
2 heaping tablespoons unsweetened cocoa
4 whole eggs
1 tablespoon butter, melted
4 1-ounce squares unsweetened chocolate, melted
1 tablespoon vanilla
4 cups (1 quart) milk

Mix all dry ingredients together in a saucepan. Add eggs, butter, melted chocolate, vanilla and milk. Mix and cook over medium low heat until thick, stirring constantly. Cool before spreading between layers of cake.


CHOCOLATE BUTTER CREAM FROSTING

2 cups confectioners' sugar, sifted
1/2 pound (2 sticks) unsalted butter or margarine, room temperature
1 cup unsweetened cocoa
1 1-ounce square unsweetened chocolate, melted
1 teaspoon vanilla
3 tablespoons (more or less) hot water

Cream sugar and margarine (or butter). Add cocoa, then melted chocolate and vanilla, blending thoroughly. Add hot water by tablespoons until mixture is spreading consistency. (Since I don't like to run out of frosting before I run out of cake, or skimp on the good stuff, I usually make a recipe and a half of this stuff. If you have any left over, it freezes well and I'm sure you can find some reason to use it sooner rather than later.)


ALWAYS DELICIOUS CHOCOLATE ICING

1 cup light brown sugar
1 cup white sugar
4 1-ounce squares semi-sweet chocolate, melted
1/2 stick unsalted butter
3/4 cup heavy cream
1 teaspoon vanilla

Combine all ingredients in sauce pan, slowly bring to a boil over medium low heat. Boil for about 10 minutes until icing begins to thicken. Then beat with hand electric mixer until thick enough to spread. Again, this is not a fluffy icing, but a thick, pasty concoction, and your fingers may useful in "patting" in onto the sides of the cake.)

A lot of trouble? You bet, but this cake is so good, (not to mention quite the showpiece), that I'm looking for an excuse to make one again soon! Anybody got a birthday coming up?

Wednesday, December 2, 2009

Fruitcake for People Who Hate Fruitcake

Of all the totemic foods we eat during the holidays, none evokes more professed negative feelings than fruitcake. It's heavy, it's cloying, and, if done right, it'll lay there in the pit of your stomach for days, churning, like the memory of that really creepy relative you only have to see once a year, maybe at Christmas. What's more, hardly anybody likes it. Well, that's the rap, but somebody, lots of somebodies actually, somewhere, must like it because, just like Santa, during the holidays fruitcake is everywhere.

My history with fruitcake is both troubled and storied. The women in my family starting making them before Thanksgiving. They shopped and chopped and baked, and then wrapped them in cheesecloth soaked in spirits, and stuffed them in big round tins to ripen. I can actually recall God-fearing church ladies of my Grandmother's generation asking a trusted source to procure them a pint for the purpose of baptizing the fruitcake. We're talking moonshine whiskey here, people, none of that store bought stuff. It was as if it was somehow less sinful to support the local backwoods distillery, (like the one rumored to be operated by my paternal grandfather), than to purchase a bottle of Wild Turkey, (which would have necessitated a trip to a liquor store in another county -- ours was dry--at the risk of being spotted), thereby validating the great, demonic, alcoholic empire certain to be the end of us all.

The fruitcake itself was truly nasty stuff, but I did like to be around for a whiff when my mother raised the lid of the tin periodically to douse the noxious mix with more firewater. She used scuppernong wine, homemade in the kitchen of Sallie Mae Montgomery, a dear friend of my late maternal grandmother. It wasn't bootlegging, but it was close.

Years later, recently orphaned and largely estranged from any extended family, I received an unexpected Christmas gift from an aunt -- a fruitcake, not homemade, but rather a Claxton Fruitcake, the epitome of everything that gives fruitcake a bad name. Rectangular logs of something that passes for candied fruit and nuts pressed into a dry, almost tasteless, batter the color of moldy cardboard, Claxton Fruitcake was and is the perfect example of a gift best expressed as "it's the thought that counts," (a sentiment that can be taken several ways). As it was, I was so touched to be remembered at all, and gushed so effusively, that every single year thereafter, until her death at 92, Aunt Ina sent me a Claxton Fruitcake. I never had the heart to tell her I threw them up on top of the refrigerator to stay, or that my housekeeper once counted five of them there in various stages of mummification.

To be fair, over the years I have encountered a few quite tolerable fruitcakes. Notably, Collin Street Bakery in Texas makes an entirely edible version that comes in a very spiffy tin. And then there's icebox fruitcake, an absolutely divine concoction, which, strictly speaking, shouldn't be called fruitcake at all. You don't have to bake it, it tastes almost like candy, and it will keep virtually forever. What more could you want?

A confection really, rather than a cake, my recipe for icebox fruitcake is adapted from "The Lady & Sons Just Desserts" by Paula Deen. (Who I hate almost as much as I hate fruitcake, but not as much as I hate Rachael Ray, but that's another post.) Even so, it's very good and very easy to make, albeit a bit messy. (Now's the time to use that plastic apron, if you have one. And careful if you have long hair. Seriously, that marshmallow/milk mixture is hell in the tresses.) I make them in little loaf pans and give them as gifts, (one recipe will make about 4 small loaves), and, gosh darn it, people like them. Or maybe they're throwing them up on top of the refrigerator. No way to really know for sure.


ICEBOX FRUITCAKE

1 14-ounce can sweetened condensed milk
1 16-ounce bag miniature marshmallows
1 pound box graham crackers, crushed
4 cups pecan pieces
1/2 of a 14-ounce bag (7 ounces) of flaked, sweetened coconut
1 pound chopped dates
1 16-ounce jar maraschino cherries, drained and cut in half
1/2 cup bourbon or whiskey

Line bottom and side of pan (or pans) with parchment paper. (It helps to cut the paper large so that it overlaps on top of the prepared cake. That way you can lift the cake out of the pan after refrigeration by pulling up on the paper)

Combine graham cracker crumbs, pecans, coconut, dates and cherries in a large bowl, reserving a few cherries and whole pecan halves for use on the top. (I use a food processor to crush the crackers.)

Heat milk and marshmallows together over low heat until marshmallows are melted, stirring constantly as condensed milk scorches easily. Remove from heat. Stir in booze. (I use Jack Daniels, but any good bourbon or whiskey will do. This isn't the time, however, to be using that bottle of Old Yard Dog that Uncle Vernon left when he went off to prison, because you can taste the booze, however faintly, in the fruitcake.)

Pour milk/marshmallow/bourbon mixture over dry mixture and blend well. (I use my hands. It's sticky and awesome messy, but I can't imagine any other way to do it.)

Scoop mixture into prepared pan or pans and mold it to fit, packing tightly so there are no air pockets. Refrigerate for at least two days before serving. And, this stuff will keep awhile. I often make mine two or three weeks ahead of time. They'll probably last forever, as long as you keep them in the fridge. (Not on top of it.)

This recipe makes one large fruitcake, or several smaller ones.

Monday, November 23, 2009

White Lily Biscuits

My White Lily Flour arrived today just in time for the holidays; 20 pounds of it, two bags of all-purpose and two bags of self-rising! I couldn't be more thrilled if Santa had delivered it himself. You see, I'm a flour snob, a Southern flour snob at that, and just any old flour won't do for my holiday baking, and particularly for the biscuits. If you don't have White Lily Self-Rising Flour for the biscuits, why bother?

When I was growing up in Georgia, we didn't know there was any other kind of flour. Well, we might have heard that catchy little stick-in-your-ear Grand Ole Opry jingle for "Martha White Self-Rising Flour...for goodness sake," but we didn't know anybody who used it. Or if we did it was somebody "way out in the country," and we for sure didn't want to be eating any of their biscuits.

What's special about White Lily? It's a fine white "soft" flour, "made from, 100% soft winter wheat" according to the the label on the bag. It's so soft they even insist that you need to add an additional 2 tablespoons of flour for every cup called for in a non White Lily specific recipe. All I know is that is makes the very best cakes, pies, cookies, biscuits, pastry of any kind, and that they don't distribute it in the West, which makes me want it all the more.

Even worse, in California self rising flour of any kind is hard to find, and that's what you have to have if you're going to do biscuits up right. For those who don't know, self rising flour is flour with salt and baking powder already added for leavening. It's very popular in the south but not so much elsewhere, though I'm betting that's only because they can't just walk into Von's and grab a bag!

I used to satisfy my White Lily fix by having friends and family haul a bag or two out whenever they came to California, and every time I was in the south I'd stock up and stuff my luggage full of five pound bags of the fluffy white stuff. (I have long been amused, and somewhat apprehensive, imagining what the TSA folks might be thinking as they x-ray my bags.) But alas, with the new bag and weight restrictions recently imposed by the airlines, this is no longer a viable option. (Seriously, twenty pounds of flour doesn't leave you much room for clothing or boiled peanuts or even your cell phone charger.) As with most things these days, a quick Google search yielded a mail order outlet and, wow, I only have to pay 60% of the actual cost of the flour in shipping charges. What a deal!

Still, it's worth it to me, and when my friends brag on my biscuits it makes an interesting story to tell. These are the best biscuits in the world, and probably the easiest you'll ever make, (just three ingredients), short of dumping them out of a bag or a can. I swear to you, it's all in the White Lily Flour, and the Crisco, of course. These are "southern" biscuits after all, ya'll.

WHITE LILY BUTTERMILK BISCUITS

2 cups White Lily Self-Rising Flour
1/4 cup Crisco
2/3 to 3/4 cup buttermilk

Preheat oven to 500 degrees. Coat baking sheet with baking spray.

In a large bowl, cut Crisco (or other shortening) into flour until the mixture has the texture of coarse crumbs.

Add milk a little at a time until dough leaves the side of the bowl and will form a ball.

Move dough to lightly floured surface and knead two or three times. Roll out to 1/2 inch thick, cut with biscuit cutter. (Don't twist. It's tempting, but the biscuits will rise higher if you don't.)

Place biscuits on prepared baking sheet and bake for 8 to 10 minutes until golden brown on top.

Makes one dozen 2-inch biscuits. The best you've ever eaten.

Sunday, November 15, 2009

A Creole Thanksgiving

Thanksgiving at our house has a distinctly New Orleans flavor. Most people assume that's because my husband hails from the Crescent City, but, truth be told, I was doing the Creole Thanksgiving thing long before I met him. (I joke that's why he married me, and, quite frankly I'm not altogether sure it's not true.!)

Back in November 1987, Bon Appetit magazine featured "Thanksgiving with a Creole Touch," and, dog eared and gravy stained, it's been my Turkey Day Bible ever since. Of course over the years I've changed the recipes substantially and adjusted the menu and seasonings to suit our specific tastes. However, the two main courses, Creole Roast Turkey and Jambalaya Stuffing, remain essentially the same. I hope you enjoy them as much as we do.

A few words about the turkey. I'm not a turkey snob when it comes to the actual bird, but rather believe it's all in the preparation. Over the years I've tried them all -- organic, free-range, fresh off the farm, happy birds, Kosher turkey, the old reliable Butterball, and the $5 Thanksgiving gobbler special from Ralph's. Truth be told, we can't tell the difference. However, I swear by my "method." I'm a briner. I think brining insures a moist, juicy, turkey and is more than worth the trouble. I use a large ice chest, fill it with enough cold water to cover the turkey, add about 2 cups of Kosher salt to the water, and plop the thawed bird inside for about 12 hours. (Overnight the night before T'Day will work well.) Every few hours you might want to add a tray of ice cubes to the mix, just so it stays cold, but other than that just leave it alone until cooking time, dry it, inside and out, and prepare as below. (For more specifics on brining, here's a link.)

Jambalaya is a Creole dish with French and Spanish influences (think Paella, southern style). This recipe will work well inside the turkey and out, and it makes a lovely stand alone dish for any occasion, be it festive or just family fare. My recipe uses sausage and shrimp, but crab, chicken, even leftover ham or turkey can be used with equal success.

About the sausage. It's worth it to seek out real Audouille sausage. We have a great source here in Los Angeles, The Sausage Kitchen over on Pico, but if you can't find it at a local butchery or meat market, Savorie's makes a totally acceptable Andoullie that is available online by mail order.

Finally, a word about the spices. You will need to experiment and adjust them to your taste, depending to a great extent on how spicy your sausage is. (Andouille can vary greatly in hotness according to who makes it.) The pepper measurements I have specified are less than was called for in the original recipe, and we like spicy foods, so that should tell you something! My best suggestion is taste as you go along. (Such a chore, but somebody has to do it!)

JAMBALAYA STUFFING
(Serves 8)
1/4 cup extra virgin olive oil
1 pound Andouille sausage, sliced
2 red bell peppers, diced
1 large sweet onion, chopped
3 celery stalks, diced
3 garlic cloves, minced
2 teaspoons dried thyme
2 bay leaves
1/2 teaspoon black pepper
1/2 teaspoon white pepper
1/4 teaspoon cayenne pepper
1 teaspoon file powder
5 cups chicken stock (canned low-sodium is perfectly fine)
1 28-ounce can diced tomatoes, drained
1 teaspoon salt
2 1/2 cups long-grain rice
1 cup sliced green onion
1 pound shelled shrimp, deveined, tails removed (Or 1 pound crab meat)

Heat oil in heavy 5-quart saucepan over medium heat. Add Andouille and stir until crisp and brown, about 10 minutes. Transfer to bowl using slotted spoon and drain on paper towels.

Add bell peppers, onion, celery, garlic, thyme, bay leaves, black pepper, white pepper, file, and cayenne pepper to saucepan. Cover and cook over low heat until vegetables are tender, stirring occasionally, about 15 minutes.

Mix in chicken stock, tomatoes and salt. Bring to boil. Stir in rice. Reduce heat to low. Cover and cook until rice has absorbed all the liquid, about 20 to 25 minutes.

Transfer rice to bowl. Mix in andouille sausage and green onions. Cool. (NOTE: Can be prepared to this point 1 day ahead and refrigerated. Bring to room temperature before continuing.)

Lightly saute shrimp in a couple of tablespoons olive oil, (with a little chopped garlic, if you like). Drain and add to rice mixture.

Reserve 6 to 7 cups of jambalaya for stuffing the turkey. Spoon the remaining jambalaya into a buttered baking dish. When ready to cook, cover tightly and bake in 375 degree oven for 40 minutes.


CREOLE ROAST TURKEY
(Serves 8)

1 16-pound turkey
Creole Butter (recipe follows)
6 to 7 cups Jambalaya Stuffing (recipe above)

Position rack in lower third of oven and preheat to 325 degrees.

Pat turkey dry. Slide fingers between turkey breast skin and meat to loosen skin. Rub Creole Butter under skin over breast meat.

Spoon jambalaya stuffing into cavity, packing firmly. Truss turkey. Roast, breast side up on rack in roasting pan, basting about every 20 minutes with pan juices, about 3 1/2 hours or until meat thermometer inserted in thickest part of thigh registers 170 degrees. (Note: You will probably find the breast meat begins to brown before the rest of the turkey. In this case, once the breast is nicely browned, tent the breast with tinfoil for the remainder of cooking time to retain juices and prevent over-browning.)

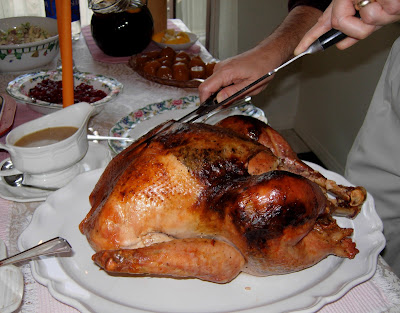
Transfer turkey to heated platter, tent with foil, and let stand 30 minutes before serving. Save pan juices for gravy, if desired.


CREOLE BUTTER
(Makes about 2/3 cup)

1/2 cup (1 stick) unsalted butter, room temperature
3 medium garlic cloves, pressed
2 teaspoons Worchestershire sauce
1 teaspoon hot pepper sauce (Tabasco preferred)
1 teaspoon dried thyme
1/2 teaspoon rubbed sage
1/2 teaspoon black pepper
1/2 teaspoon white pepper
1/2 teaspoon cayenne pepper
1/4 teaspoon ground allspice

Blend all ingredients in food processor until smooth. (Note: Can be made 4 days in advance and refrigerated or frozen for up to one month. Bring to room temperature before using.)

HAPPY THANKSGIVING, ya'll!

Thursday, November 12, 2009

Gnocchi 103 - Deep Gnocchi

Grumento Nova is a little town in the southern Italy, built on the site of the Roman settlement of Grumentum, thus the name Grumento Nova. As for Grumento Nova the gnocchi, one must assume it is somehow associated with the town, or one of its 1,839 residents, 39.4% of whom share the surname, Caputi. Exactly how, I couldn't say.

Grumento Nova gnocchi is the proverbial Ugly Duckling of gnocchi, irregularly shaped lumps of dough that look more suitable for throwing at the dogs than eating. But do not be deceived, bathed in butter and kissed with sage and truffles, it becomes the most sophisticated comfort food imaginable; "toothsome" without being chewy, distinctly flavored but not overpowering, and sinfully rich. Because it is so "big" and filling, I recommend serving it as a side dish rather than the main course. It's the perfect companion for a roast pork loin, for instance.

This is serious gnocchi for the serious gnocchi lover, and proof that delicious things do not always look as good as they taste. (Consider the truffle, for instance. I mean, who would've thought?) The truffles in the brown butter-sage sauce are optional, but I recommend them highly. If you can get them, use them. If not, order them on-line and use them next time.

Try this dish. If you don't like it, I'll come over and take it off your hands.

GRUMENTO NOVA GNOCCHI
(8 servings)

3 eggs
3/4 cup Parmesan-Reggiano cheese, freshly grated
1/2 teaspoon baking powder
Dash of black pepper
Pinch of kosher salt
2 cups milk (or more)
2 pounds all-purpose flour

Mix first five ingredients together in a large bowl.

Gradually add milk, alternating with the flour. Mix together until the mixture is the consistency of a VERY thick pancake batter.

Cover the dough with plastic wrap and let rest of 5 minutes.

Prepare a large pot of generously salted boiling water. Use a tablespoon or a small scoop, (I recommend a melon ball or very small ice cream scoop with a mechanical release), drop lumps of dough into the pot one at a time. (If the dough is sticking to the spoon, dip the spoon in a glass of warm water to continue. Another reason to use a scoop with a release feature.) Be careful not to overcrowd the pot. (The dough will not, repeat, will not, be little round balls, but rather irregularly formed lumps. Deal with it.)

Cook the gnocchi for 5 minutes. Drain and serve with brown butter-sage sauce.

If you are going to freeze some of this gnocchi, cook it for 4 minutes. Then, after it has defrosted, dunk it in the boiling, salted water for 1 minute to warm and complete cooking.


BROWN BUTTER SAGE SAUCE
(4 servings -- double for 8 servings)

1/2 pound (1 stick) Unsalted butter
3 Tablespoons Fresh sage leaves, finely chopped
1 Black truffle, shaved (or use dried truffles) -- Optional
Salt and black pepper to taste

Heat butter in a large (11 or 12-inch) skillet, without stirring, until the butter stops foaming and turns a light brown.

Add sage, truffle (optional) and salt and pepper to taste. (If using dried truffles, place about 3 tablespoons in a bowl and soak in hot water for at least a half hour before using.)

Add gnocchi to pan and shake and stir to just coat with butter mixture.

Remove from heat and serve. Sublime.

Tuesday, November 10, 2009

Gnocchi 102

I'm a big fan of basil pesto, so imagine my delight when I discovered yet another pasta with which it makes the perfect match.

Ricotta gnocchi is a denser, heavier gnocchi than potato gnocchi, but no less satisfying, and, as a bonus a lot easier to handle given its' sturdier composition. And, by the way, ricotta "cheese" isn't really a cheese, but rather a cheese by-product, namely whey, and therefore has less fat than cheese making it a "healthier" option. (I guess "Little Miss Muffet, sat on her tuffet, eating her curds and ricotta" just didn't catch on.)

Finished with a basil pesto this makes a delightful side dish or, just add a salad, a loaf of crusty French or Italian bread, a bottle Pinot Gris, of course, and make it a meal!

Ricotta Gnocchi is probably the easiest gnocchi to make, takes well to any kind of sauce, and is certainly one of the most delicious. So what are you waiting for?

RICOTTA GNOCCHI
(6 to 8 main servings)

2 pounds whole milk ricotta
6 cups all-purpose flour
1 tablespoon olive oil
2 eggs
1 whole nutmeg, grated
Pinch Kosher salt

Mix ricotta and flour in a large bowl.

In another bowl, whisk together the eggs, olive oil, salt and grated nutmeg.

Make a "well" in the flour/ricotta mixture and place the egg mixture into the center. Gently knead the mixture together. Cover the dough and let rest for 5 minutes.

Roll the dough into several long ropes about 3/4-inch thick. Cut each rope into 3/4-inch pieces. Using back of fork, gently press prongs onto one side of each gnocchi to make a dented design.

Place gnocchi on a baking sheet lined with waxed paper and continue until all dough has been used. (Gnocchi may be stacked in several layers separated by waxed paper.) At this point you can either cook or freeze the gnocchi. (It makes a lot so you'll probably want to freeze some for later.)

To cook, prepare a large pot of generously salted boiling water. Drop gnocchi into the pot. When it rises to the top, cook for 5 minutes. (Don't overcrowd the pot.)

Drain and serve with pesto sauce (below) or your favorite Italian sauce.

BASIL PESTO
(Enough for about 6 servings)

2 1/2 to 3 cups (packed) fresh basil leaves
4 or 5 cloves garlic, roughly chopped
3 tablespoons toasted pine nuts
1 cup freshly grated parmesan cheese
3/4 cup extra virgin olive oil

Put garlic and pine nuts into food processor with blade attachment. Process until garlic and nuts form a paste. Add parmesan cheese, process until well mixed. Add basil leaves. Pulse processor until basil leaves are roughly chopped but not pulverized. Gradually add olive oil, pulsing gently after each addition until well mixed. (I like my pesto kind of "chunky," but if you're a smooth pesto person, feel free to process it longer.)

Toss with gnocchi or your favorite pasta and serve. Yummmm....

Monday, November 9, 2009

Gnocchi 101


Gnocchi means "lump" in Italian, and that's exactly what it is, lumps of dough, (we southerners would call them dumplings), cooked in boiling water and served with any number of scrumptious Italian sauces. Sound simple? Hardly. The road to gnocchi is littered with the bodies of cooks (myself included) who thought, "oh, I can do that," and tried, without doing their culinary homework. That being said, it's well worth the effort to learn to prepare gnocchi properly, and once you master a few little tricks, it becomes almost as easy as it sounds.

My love affair with gnocchi began, appropriately enough, in a lovely little restaurant in Siena where they served the most delicate little puffs of dough in a spicy Arrabbiata Sauce as an "entree" (that's appetizer for us here in the US). It was so good that we ate there three nights in a row, paired the gnocchi with a trip (or two) to the Antipasto table and made a meal of it.

Back home I bought a popular Italian cookbook, followed the recipe for potato gnocchi to the letter, and had a heart stopping moment of absolute despair as I watched them fall apart in the boiling water. Fortunately I had a box of dried pasta to serve with the delicious Bolognase Sauce I had prepared, but it was years before I mustered up the courage to try making gnocchi again.

Then, for our anniversary this year the husband gave me a "Gnocchi Workshop" cooking class at Sur la Table, and I learned what had possibly gone wrong. There are three reasons gnocchi might dissolve in the water. First of all, never, but never, use a gnocchi recipe that doesn't call for egg! It's an essential binder and although you'll find gnocchi recipes galore, (like the one I had previously used), that omit the egg, you are courting disaster. Secondly, my potatoes may have been overcooked. You want them just done, not falling apart mushy. And finally, maybe I needed more flour. If your dough is sticky after you've added all the flour, add a little more so the dough is firm but still moist.

Anyway, I'm happy to say you won't need to go to Italy to fall in love with gnocchi. (Although it's not a bad idea at all!) Just use the recipes I'll be sharing over the next few days and start your love affair with gnocchi in the comfort of your own kitchen.

Another great thing about these recipes is that they make a pile of gnocchi, (enough to serve 6 as a main course or many more as a side dish), and you can freeze them. I usually make up a batch and freeze them in three or four bags of two-servings each. Then when we want it, I can just take it out of the freezer, whip up (or defrost) a sauce, and make a quick meal.

For starters, here's a nice, fluffy, classic, potato gnocchi recipe, (although, interesting to note, the Italians didn't use potatoes to make gnocchi until the potato was introduced to Europe in the 16th century), and a rich, meaty Bolognese Sauce. (Though any tomato sauce or pesto will complement it nicely.) Enjoy.

POTATO GNOCCHI
(6 servings)

6 large Russet potatoes
2 eggs
3 cups all-purpose flour
1/4 teaspoon baking powder
1/2 cup milk
2 tablespoons unsalted butter
1 teaspoon salt

Boil whole, unpeeled, potatoes in a large, partially covered, pot, with boiling water and a dash of salt. Cook until potatoes can be easily pierced through with blade of a paring knife. (Do not overcook)

As soon as the potatoes are cool enough to touch, but are still warm, (the hotter the better), rice them in a potato ricer. (The peeling will be caught in the ricer. Pick any bits that fall through out of the potatoes.) Put riced potatoes in a large bowl. Add the butter, baking powder and salt. Mix well.

In another bowl, beat eggs and milk together. Add to potato mixture and mix well.

Gradually add flour to form a firm but moist dough. (Dough should not be sticky. If sticky, add more flour.)

Roll dough into long ropes about 1/2 inch thick. Cut into 1/2 inch long pieces. After cutting the gnocchi, press each piece lightly with your thumb to form a small indentation on one side. Place gnocchi on a baking sheet lined with waxed paper. Cover with another sheet of waxed paper and continue to form dough. (You can actually stack a couple of layers of gnocchi, separated with waxed paper, on the same baking sheet.)

Gnocchi may be frozen or cooked within 3 hours. Cook in batches in a big, deep pot of boiling, generously salted water. (Don't overcrowd the pot.) When the gnocchi float to the surface, cook for 5 minutes, lift from water with a slotted spoon, drain and add sauce. Serve with freshly grated Parmesan cheese,

To freeze, put the tray with the gnocchi in the freezer. When they are solid, scrape them into a plastic freezer bag, seal and use as you wish. To thaw, place in a single layer on a baking sheet lined with waxed paper. Gnocchi thaw quickly, in a couple of hours. Cook as above.

No time to thaw, just dump the frozen gnocchi into the pot of boiling water, add about a minute to the cooking time, and you're good to go. What could be simpler?

BOLOGNESE SAUCE
(6 to 8 servings)

1/4 cup Extra Virgin Olive Oil
2 ribs celery, finely diced
2 medium carrots, finely diced
2 medium sweet onions, finely diced
1 pound ground pork
1 pound ground beef
2 cups red wine
12 ounce can tomato paste
2 cups milk
Salt and black pepper to taste

Heat olive oil a heavy medium sized saucepan over medium heat. Cook celery, carrots and onions until soft and lightly browned, about 15 minutes, stirring frequently.

Add ground meats, turn heat to high and cook until meat is done and all the fat has cooked off, about 15 minutes. Add red wine and cook until liquid is evaporated. Add tomato paste. Cook with meat for about 5 minutes.

Add milk, season with salt and pepper, and cook over low heat for about 1 hour. Adjust seasoning and serve over gnocchi or your favorite pasta.

If you're only making a couple of main dish servings or side dish servings, it freezes well for later use.


Wednesday, October 28, 2009

Boo Food

A sure sign that Halloween is upon us. Bob’s Donuts in the Farmer’s Market is making their seasonal black cat and pumpkin motif donuts. I bought one of each just to take these photos, and then I had to eat them. I hate it when that happens.


There are lots of recipes for Halloween foods out there, most of them simply variations of stuff you would eat any other time of the year – the aforementioned donuts, cupcakes, candied apples, candy, candy and more candy. But only one really speaks to my imagination as an original. (I don't even want to speculate about the mind that came up with this one.) Kitty Litter Cake has been floating around the internet for awhile, and although I haven’t made it yet I plan to when an appropriate occasion presents itself. Maybe to take into the office on the last day on a job that I hate or for the birthday of somebody I’d really rather not be remembering. Or maybe next Halloween


I do know some people who have made the cake, (and beg to remain nameless) and they insist it’s pretty darn tasty. (Cake, pudding, cookies, candy – what could be bad?) But really, who cares what it tastes like? This is one of those desserts you just make for the look. Anticipate oohs and aahs, and keep it well out of the way of the cats.


KITTY LITTER CAKE

1 box spice or German chocolate cake mix
1 box of white cake mix
1 package white, vanilla sandwich cookies
1 large package vanilla instant pudding mix
A few drops green food coloring
15 small Tootsie Rolls

SERVING "DISHES AND UTENSILS"
1 NEW cat-litter box (small size)
1 NEW cat-litter box liner
1 NEW pooper scooper

Prepare and bake cake mixes, according to package directions. Prepare pudding and chill. Crumble cookies in small batches in blender or food processor. Add a few drops of green food coloring to 1 cup of the cookie crumbs. Mix with a fork or shake in a jar. Set aside.

When cakes are at room temperature, crumble them into a large bowl. Toss with half of the remaining cookie crumbs and enough pudding to make the mixture moist but not soggy. Place liner in litter box and pour in mixture.

Unwrap 10 of the Tootsie Rolls and heat in a microwave until soft and pliable. Shape the blunt ends into slightly curved points. Bury the rolls in the cake mixture. Sprinkle remaining white cookie crumbs over the mixture, then scatter the cup of green tinted crumbs lightly over top.

Heat remaining 5 Tootsie Rolls until soft and pliable, shape and scatter them on top of the cake, hanging a couple decoratively over the edge of the box. Sprinkle with crumbs from the litter box. Place box on a sheet of newspaper and serve with scooper. Enjoy!

Monday, October 12, 2009

Better Than Apple Pie

So I'm making "my" now famous Beouf Bourguinon, (sorry about that, Julia), for dinner with friends this weekend, and it occurs to me that I need a really good, but not complicated, dessert to show off and finish off the meal -- maybe something French, fallish and fruity -- when I remember seeing this recipe for Tarte Tatin, (that's an upside down apple tart), in the October issue of Cooking Light magazine. Sounds perfect, and it was.

I confess that I've never been a big apple pie fan and, to be completely honest, apples aren't near the top of my list when it comes to favorite fruits. However, I do like caramel, and pastry, and you really can't argue with the wonderful fragrance baking apples send throughout the house; all reasons enough to give it a try. Plus, I'm always looking for an opportunity to use my cast iron skillet, an implement I consider to be one of the most under-rated and under-used pieces of hardware in any kitchen.

The dessert itself is very easy to prepare. The only tricky part is getting it out of the pan after baking. If you try to invert it onto the plate too soon you'll end up with a syrupy mess, (and you'll probably burn your hands as well), and if you let it sit too long, the caramelized sugar will harden and it won't come out of the pan. (If this happens, return it to the oven for a few minutes to loosen.) Worst case, the pastry will release and leave the apples in the pan, which isn't exactly a disaster because you can always scoop them out with a spatula, pop them onto the crust and pat them into place. Nobody will know the difference, nor will they care once they taste this little slice of apple heaven.

It's not your Mom's apple pie. Heck, it's not even American. But once you're tried it you'll never settle for plain old apple pie again.

Oh, and about that Cooking Light part? You knew it was too good to be true, didn't you? The magazine gives the calorie count at 275 calories per serving for TEN servings! Er, better make that ten SLIVERS. This tart will serve SIX, assuming everybody has what any normal food loving human being would consider an average size portion. So let's just say it makes six servings at 458 1/3 calories each. And it's worth every one of them.

TARTE TATIN

Pastry
1 1/2 cups all-purpose flour
1/4 teaspoon salt
6 tablespoons butter, softened
2 or 3 tablespoons water
1 large egg

Filling
1 cup sugar
2 pounds Golden Delicious apples (5 large or 6 small) cored and cut into six slices each
1/4 teaspoon ground cinnamon
Creme fraiche (to serve on top)

Preheat oven to 400 degrees.

Cut butter into flour and salt with a pastry blender until mixture resembles coarse meal.

Whisk together 2 tablespoons water with the egg and add to flour mixture, stirring until just moist. (If too stiff, add additional 1 tablespoon water.)

Turn dough out onto floured surface and knead lightly 4 or 5 times. Pat dough into a disk, cover with plastic wrap and let chill at least 30 minutes.

Combine 1/4 cup water and sugar in a 9-inch cast-iron skillet over medium-high heat. Cook, stirring occasionally, until sugar caramelizes and is golden in color. Remove from heat, tilting pan to evenly distribute cooked sugar, and let stand 5 minutes.

Arrange apple slices tightly in a circular pattern over sugar. Place pan over medium heat and cook 20 minutes, pressing down on apples slightly to extract juices. Remove from heat, sprinkle with cinnamon, and let stand for 10 minutes.

Turn dough onto floured surface and roll into an 11-inch circle. Place over apple mixture, fitting dough between apples and skillet.

Bake at 400 degrees for 20 minutes or until lightly browned. Cool 10 to 15 minutes. Invert tart onto a plate.

Serve with creme fraiche.
It really is better than apple pie.


Saturday, September 26, 2009

How to Stuff an Egg

I've been a fool for stuffed eggs since I was a kid. You can call them deviled eggs if you wish, but I like to distinguish between the spicy, paprika, pickle and onion egg concoctions most often presented and the creamy, mild, slightly piquant stuffed eggs of my youth. That being established, I can honestly say I've never met an egg, be it stuffed or deviled, that I didn't like.

Stuffed eggs are another of those southernisms that have as many versions as cooks who make them, but the women in my family had a touch that was unique, and unfortunately they passed on before passing on the secret to me, which I still consider terribly inconsiderate of them.

To say I spent years searching for this recipe would not be an exaggeration, and although I made some lovely eggs along the way, even discovered entire books of deviled egg recipes, the formula for the melt-in-your mouth treats of my childhood remained elusive.

Then I saw this recipe in "The Gift of Southern Cooking" by Edna Lewis and Scott Peacock, (which just may be the best southern cookbook of all time), and eureka! The minute I read it I knew I'd found it, the Holy Grail of stuffed/deviled eggs was mine at long last. The secret? Vinegar and cream!
They're smooth and fluffy with just the right amount of tang and such a bite of heaven there's no way you could call them deviled. And since I don't think there's any such word as angeled, (if there was, these would definitely be angeled eggs), I call them simply sublime.


Before you begin though, a few tips. Let's face it, eggs can be a bitch to peel. The secret to getting a perfectly peeled egg is not to use the freshest eggs in the store. Buy them at least a week before using, if you can, and, that failing, always purchase the eggs with the nearest "sell by" date, (just the opposite of what you would usually do). Make sure the eggs are at room temperature before boiling them and they'll be much less likely to crack. Finally, to assure that the yolk is in the center, turn the cartons on their sides the night before. Sometimes it works, sometimes not, but, hey, it's worth a try.


SIMPLY SUBLIME STUFFED EGGS

1 dozen large eggs
1 tablespoon, plus 1/2 teaspoon salt
1 1/2 tablespoons cider vinegar
1 teaspoon sugar
1/2 cup mayonnaise
2 tablespoons heavy cream
Finely chopped chives

Put the eggs in a large saucepan, cover with water and add 1 tablespoon of the salt and 1 tablespoon of the vinegar. Bring to a boil over high heat. Remove from the heat and let them sit, covered, for 10 minutes. Pour off the hot water and immediately run cold tap water over the eggs to stop the cooking, shaking the pan as you do to crack the eggshells.

When cool enough to handle, peel the eggs. Slice in half and remove yolks to a mixing bowl. Finely mash yolks with a fork or potato masher (or put them through a potato ricer). Mix in remaining 1/2 tablespoon vinegar (1 1/2 teaspoons), 1/2 teaspoon salt, sugar and mayonnaise. Blend until smooth. Beat in cream. (If you want them really smooth, use a hand mixer.) Taste and adjust seasonings, adding more salt, sugar or vinegar if needed. If too dry, add a bit more cream or mayonnaise.

Using a teaspoon, (or pastry bag if you want to get fancy), fill the egg white halves. Arrange on an egg plate, (You DO have an egg plate, don’t you?), and sprinkle with chopped chives.

Tuesday, September 15, 2009

"That" Boeuf Bourguignon

You knew I'd have to do it -- make Julia Child's Boeuf Bourguignon. Once I saw the movie, Julie and Julia, it was inevitable. Either that or Pate De Canard En Croute, and I'm sure as hell not boning a duck. I'm not chopping a beef roast into little cubes either for that matter, not as long as there's a butcher or supermarket to do it for me, but if one has to make something from Mastering the Art of French Cooking, (and I did), Boeuf Bourguignon seems a good place to start.
Hey basically it's a beef stew, all right. A fancy and refined beef stew to be sure, but stew all the same. (OK, Julia would have me modify that to say that, strictly speaking, Boeuf Bourguignon is a fricassee, which is the term used to label any preparation in which the meat is browned before it is simmered. Got it?) And unlike other beef stews where you just throw everything into one pot and put it on the stove, THIS beef stew is an invitation to mess up every pot, pan and utensil in the kitchen. Is is worth it? I dunno. It is pretty darn delicious, and I'd say for an occasion you might want to go for it.

It's a lot of trouble, and time consuming, (plan on spending an afternoon in the kitchen), though not terribly fussy, and I'm guessing that after making it a few times one will learn one's own little short cuts (forgive me, Julia) to make it easier and more worthwhile. Plus, it's one of those dishes you can make entirely the day before and just reheat, and there's always something to be said for that. (In fact, it's actually better the second day after the flavors have melded and the beef has mulled overnight in the rich sauce.)

One important note; the recipe calls for a chunk of bacon cut into sticks. It is worth it to try and find fresh, uncured bacon, which isn't as difficult as it may seem. Most any good butcher or meat market will have it. If you end up using cured bacon, it will need to be blanched (see recipe), but will work fine. It's just an extra step that's good to avoid if possible.

That all being said, I still think that Julie chick from the movie is bat-shit crazy,
obsessive compulsive at the very least, either that or she's lying like a dog. 524 recipes in 365 days in a 900 square foot apartment with a husband, three cats and "something" named Buffy, (according to her blog)? Give me a break. And that husband of hers? He's not a saint, he's a major enabler. I mean seriously, I live in a 1700 square foot apartment with just two cats and a husband, (no Buffy), and it's all I can do to make Beouf Bourguignon on a quiet Sunday afternoon when the Mr. is out. And guess what? We liked it so much I may just do it again.

JULIA CHILD’S BOEUF BOURGUIGNON
(Makes 6 servings)

8-ounce chunk bacon (fresh, uncured and unsmoked, if you can find it)
2 tablespoons olive oil
3 pounds lean stewing beef, cut into 2-inch cubes
1 large carrot, sliced
1 large onion, sliced
1 teaspoon salt
1/2 teaspoon black pepper
2 tablespoons flour
3 cups full-bodied red wine, such as a Beaujolais, Burgundy or Chianti
3 cups brown beef stock (I used canned beef bouillon)
1 tablespoon tomato paste
2 cloves garlic, mashed through a garlic press
1/2 teaspoon thyme
1 bay leaf, crumbled

25 small white onions
1 1/2 tablespoons unsalted butter
1 1/2 tablespoons olive oil
1/2 cup of brown beef stock or red wine
Herb bouquet: 4 parsley sprigs, 1/2 bay leaf, 1/4 teaspoon thyme tied in cheese cloth
Salt & pepper to taste

1 pound fresh mushrooms - whole if small, otherwise cut into halves or quarters
4 tablespoons unsalted butter
2 tablespoons olive oil

Remove the rind and cut bacon into sticks 1/4 inch thick and 1 1/2 inches long. If using cured bacon, simmer the bacon sticks and rind for 10 minutes in 1 1/2 cups water. Drain and pat dry. This is called blanching the bacon, assuring that the smoked flavor of cured bacon doesn't overwhelm the other, subtler flavors in the dish. Also, if you are using cured bacon you may need to add a little oil for sauteing the meat as blanching cooks some of the fat out of the bacon.

Preheat oven to 450 degrees.

Saute the bacon in 1 tablespoon olive oil in a large oven proof, flameproof casserole (9 to 10- inches) for 2 to 5 minutes until lightly browned. Remove to a side dish. Reheat the fat until it is almost smoking.

Dry the beef in paper towels; it will not brown if it is damp. Saute a few pieces at a time, in the hot oil and bacon fat until nicely browned on all sides. Set aside with the bacon.

Brown the sliced carrot and onion in the same fat. Drain. Pour out fat.

Return the beef and bacon to the casserole and toss with the salt and pepper. Then sprinkle on the flour and toss again to coat the beef lightly with the flour. Set casserole, uncovered, in middle position of preheated oven for 4 minutes. Toss the meat again and return to over for 4 minutes more. (This browns the flour and coats the meat with a light crust.) remove casserole and turn oven down to 325 degrees.

Add carrot and onions to casserole. Stir in the wine and beef stock. Add tomato paste, garlic, bay leaf and thyme. Bring to simmer on top of the stove. Then cover casserole and set in lower third of the 325 degree oven. Cook for 2 1/2 to 3 hours until the meat is easily pierced by a fork. Do not overcook.

While the beef is cooking, prepare the onions and mushrooms.

Peel the onions. (If you want to use frozen onions, fine by me. Peeling them is a pain and Julia will never know.) Heat 1 1/2 tablespoon butter and 1 1/2 tablespoon oil in a 9 to 10-inch skillet until bubbling. Add onions and saute over moderate heat for about 10 minutes, rolling them about so they brown as evenly as possible. Pour in beef broth or wine, add herb bouquet, and simmer slowly for 40 minutes until the onions are tender but retain their shape and most of the liquid has been absorbed. Remove herb bouquet and set onions aside.
(Is it just me, or do these look like eyeballs rolling around in the pan?)

Trim and slice mushrooms. Place 9 to 10-inch skillet over high heat with 4 tablespoons butter and 2 tablespoons olive oil. As soon as the foam has begun to subside, add mushrooms. Toss and shake the pan for 4 to 5 minutes. (During the saute the mushrooms will absorb the fat, but you don't need to add more.) Continue to saute until mushrooms are lightly browned. Remove from heat and set aside.

When the beef is tender, pour the contents of the casserole into a sieve set over a large saucepan. Wash out the casserole and return the beef and bacon to it. Distribute the cooked onions and mushrooms over the meat.
Skim the fat off the sauce in the saucepan. Simmer sauce for a few minutes until thick enough to coat a spoon lightly. You should have about 2 1/2 cups of sauce. If it is too thin, boil it down to the desired consistency. If too thick, add a little wine or beef stock. Taste and adjust seasonings. Pour the sauce over the meat and vegetables. (NOTE: I'm not altogether sure this sieving and simmering step is absolutely necessary. My sauce was perfectly seasoned, coated a spoon and didn't need boiling down right, out of the pot. Still, Julia said to do it, so I did.)

Cover the casserole and simmer for 2 to 3 minutes, basting the meat and vegetables with the sauce several times. Bon appetit!

Tuesday, September 1, 2009

Lard Is Just A Four Letter Word


Time was when dropping the L-bomb at mealtime was enough to send any "modern" cook screaming from the kitchen and the average dinner guest running from the table, clutching his heart with one hand and dialing his cardiologist on his cell phone with the other. But I'm here to tell you that lard has gotten a bad rap, and like any other good four letter word a dollop of it can add a little something special in any number of situations, culinary and otherwise.

Now I won't lie. It ain't health food, but it's not as bad for you as you may have been led to believe, and it may actually be better for you than some of the allegedly healthier fats you've been using instead. And let's face it, there are some things that are just plain better with lard. Pie pastry and fried chicken come to mind,
(absolutely nothing gives pastry the tender, flaky texture that lard does and, trust me, if you ever eat chicken fried in lard, you'll never go back.), and since, in our house at least, these are treat foods that we don't eat very often, I say, go for it.

Let's consider the alternatives for pastry.

Like most cooks in the last century or so, my mother swore by Crisco, and it does make an altogether acceptable, even delicious, pie crust. The original Frankenfood, Crisco, strictly speaking, isn't food at all but rather a hydrogenated cottonseed oil concoction invented by Procter & Gamble and put on the market in 1911. It sort of looked like lard. It was odorless and tasteless, it didn't go rancid quickly, as lard was want to do, and it was a real boon for "our Jewish friends," (as a 1922 Crisco booklet pointed out), because it was Kosher! If anybody missed the richer, fuller flavor and delectable crumb of lard made pastry, they were loath to admit it, and within a generation most people had forgotten how it tasted anyway. Lard was off the table and Crisco was king.

Oh, and did I mention it was hydrogenated with trans fats? Well, sometime around the middle of the 20th century scientists discovered that trans fats, and therefore Crisco and the other hydrogenated vegetable shortening spin-offs, weren't very good for the human body, and were at least as bad for you as, if not worse than, solidified pig fat. (To be fair, Crisco recently introduced a zero trans fat shortening, in the green can. I haven't tried it so I can't comment on its' merits or not.)

Butter made pie pastry is melt in your mouth good, but, in my experience, often too tender and therefore difficult to handle, and will literally crumble if you breathe on it. Plus, with a whooping 60 percent saturated fat content, (compared with just 40 percent for lard), it's definitely not a healthier choice.

Because solid vegetable shortening is tasteless, some cooks have made a respectable pie crust by combining it with butter, again, probably worse for you than lard, but tasty if you like the butter flavor. As for oil made pastry? Forget about it. Seriously. If you really like pie, you won't like it.

I have seen some pie pastry recipes that use a combination of butter and lard, which sounds pretty good to me. Haven't tried it, but I will and when I do, I'll get back to you.

And that brings me back to LARD, our grandmother's gold standard, which I have rediscovered and embraced. Here's my recipe for basic pie pastry, lifted straight from the pages of Southern Cooking From Mary Mac's Tea Room. After you've made the pastry I can't think of anything better to do with it than make up a batch of one of my favorite guilty pleasures -- peach turnovers. Bake them if you want to cut down on the fat a bit, (I've actually come to prefer them this way), or stick with tradition and fry them up in hot peanut oil, (save the lard to fry chicken). You'll be glad you did.

NOTE: Some commercial supermarket lards have been hydrogenated to enhance shelf life. Read the label.
If it's hydrogenated or partially hydrogenated, you do not want this lard. You want one that contains zero trans fats.


BASIC PIE PASTRY


1 cup lard (or other solid shortening, if you must)
3 1/2 cups all-purpose flour (I swear by White Lily)
2/3 cup ice water, with crushed ice
1 1/2 teaspoons salt
1 1/2 teaspoons sugar

Cream lard with salt and sugar in large bowl of electric mixer. Add one cup of the flour. When the mixture becomes stiff, add 1 tablespoon of the ice and water. Repeat process until all the flour and water is used. Mixture should be soft but not wet.

If making turnovers, roll the dough into 10 equal balls and refrigerate for at least 1/2 hour. (This pastry can be kept for several weeks in a sealed plastic bag in fridge or frozen for up to a month.)


PEACH TURNOVERS
(Makes 10 pies - Baked or Fried)

12 ounces dried peaches
2 cups water
2/3 cup sugar
2 tablespoons lemon juice
1/4 cup whiskey or bourbon (I use Jack Daniels -- optional)
1/2 teaspoon cinnamon
1/2 teaspoon nutmeg

In a medium saucepan, bring peaches and water to a boil. Lower the heat, cover and simmer until the peaches have reconstituted, are very tender and have absorbed most of the water. (About 2o minutes).

Mash peaches. Add sugar, whiskey, lemon juice, cinnamon and nutmeg. Simmer over low heat for about 10 minutes more, stirring frequently, until the peach mixture is thick like preserves. Cool.

On floured board with floured rolling pin, flatten dough balls into circles about 6-inches round and 1/8 inch thick. Place about 2 tablespoons of the peach mixture in the center of each circle. Brush edges with cold water, fold over and seal by pressing fork tines around edge. Trim excess dough.

TO FRY: Heat 2 1/2 cups peanut oil in a large skillet (cast iron if you have it) until the oil is very hot (about 375 degrees). Fry pies in batches, turning once, for about 2 minutes per side, until golden brown. Drain on paper towels. Sprinkle with sugar before serving if desired.

TO BAKE: Prick top of pies with fork several times to vent. Brush with melted butter or an egg wash, (1 egg lightly beaten with 2 tablespoons milk and a pinch of salt). Sprinkle with sugar if desired. Place on prepared baking sheet, (lightly greased, or, my preferred method, lined with a sheet of non-stick tin-foil). Bake in 350 degree oven for 20 to 25 minutes, until lightly brown.

Either way, serve these puppies warm with a couple of big scoops of vanilla ice cream. Yum!

Thursday, August 27, 2009

Mo' Tomatoes


In my search to find more stuff to do with the surfeit of tomatoes I find myself wallowing in, and inspired by a half loaf of leftover French bread, I recalled a simple but scrumptious appetizer I first tasted when we visited Italy a few years ago and have enjoyed since in some of the better Italian eateries. Bruschetta (pronounced broo-skeh-tuh) are, (It's always plural. I guess you'd never order one "Bruschetti."), delicious little morsels of toasted bread topped with what amounts to an Italian tomato salsa. I looked on-line for a good recipe, one for which I had all the necessary ingredients on hand, and, not coming up with exactly what I was looking for, I took a bit of this one, and a bit of that one, and created a version that I think is just about the bomb.

I used three different colored heirloom tomato varieties, (Green Zebra, Kellogg's Breakfast, and Brandywine), because that's what I had on hand, and it does make for a beautiful presentation with the green, yellow and red tomatoes bathed in olive oil and sprinkled with little white flecks of garlic and onion. However, I'm quite sure it would be almost as good with any fresh tomatoes.

As for the bread, if you can buy it the day before so it's slightly stale it's best and easier to slice but, if not, no worries. (BTW, Bruschetta actually refers to the bread itself, which can theoretically be topped with anything, or nothing at all, and still be called Bruschetta.) Some purists brush the bread with olive oil before toasting, but I prefer a quick spritz of I Can't Believe It's Not Better spray. (It's less messy and less fattening, and has quickly a staple in my kitchen for all kinds of stuff. You'll like it!)


HEIRLOOM TOMATO BRUSCHETTA

4 large tomatoes, assorted heirloom varieties, seeded and chopped
2 tablespoons finely chopped fresh cilantro
2 tablespoons finely chopped green onion
2 cloves garlic, minced (or put through a garlic press)
4 tablespoons finely chopped fresh basil
1/4 cup extra virgin olive oil
salt and pepper to taste

1 French baguette bread loaf
Margarine spray or olive oil for bread

Combine tomatoes, cilantro, onion, garlic, basil, olive oil, salt and pepper in a medium bowl. Cover and refrigerate for at least 3 hours to combine flavors.

Cut baguette on the diagonal into 1/4 inch slices. Brush each side lightly with olive oil or spray with margarine spray (preferred). Place on large baking sheet (lined with tinfoil to minimize clean-up) and toast in oven, turning once, until lightly brown on both sides.

Serve tomato mixture on toasted baguette slices.